
Your cart is currently empty
My Favourite Photographs of 2018
January 4, 2019
And just like that, another year has gone by! 2018 was a pretty good year for me and my photography. I travelled to some amazing places and even had the opportunity to tick a few things off the bucket list as well. As for my photography, I feel as though I have learnt a lot during the last 12 months and can’t wait to see what 2019 brings.
For this post, I thought I’d revisit the photographs I took during 2018 and pick out a few of my favourites. For each photograph, I have included the location and settings used, along with a description of what I was trying to achieve when I took the photograph. I hope you enjoy them.
Three Sisters - Blue Mountains - Australia
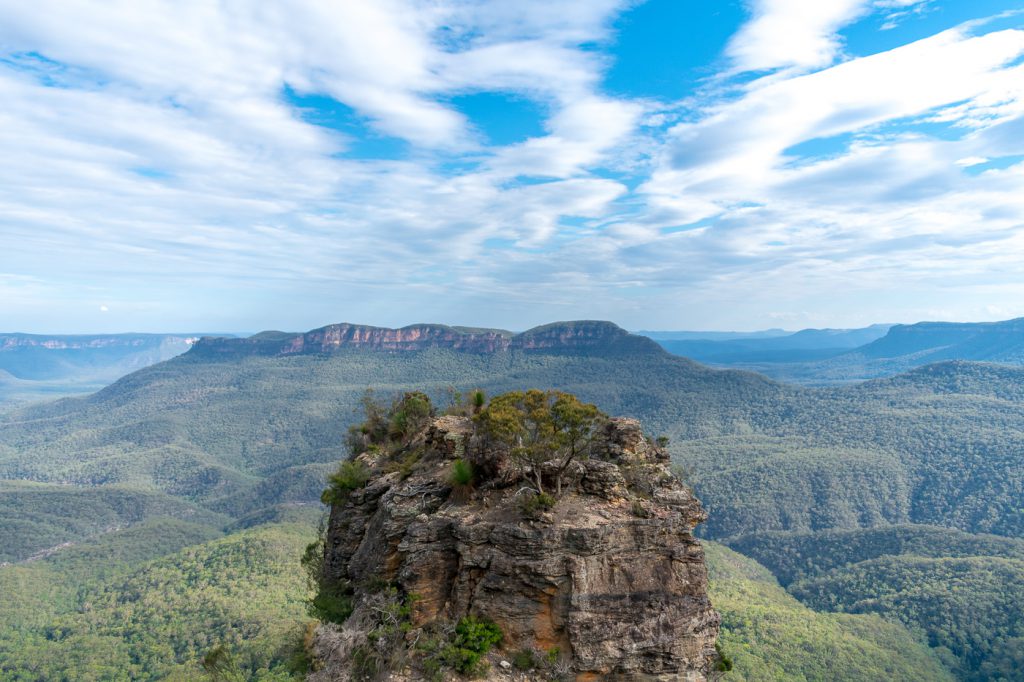
Settings: ISO100 – f3.5 – 1/1250 – 18mm
I was lucky enough to visit the Three Sisters in the Blue Mountains during my first trip to Australia. For those of you that don’t know about the Three Sisters, they are a rock formation formed by the erosion of the Blue Mountains and are located near Katoomba. They have the aboriginal names of Meehni (tallest), Wimlah, and Gunnedoo (shortest) as well as an Aboriginal legend which describes how they were formed. You can read the story here.
I’d had my camera for a little over a month when I took this, so it’s fair to say I wasn’t too sure what I was doing. I decided to take a photograph of the top of Meehni looking out over the Blue Mountain region purely because I thought it looked cool. Not much more thought went into the photograph than that. The thing I remember being really pleased about at the time was how sharp the top of Meehni was in the photograph. It really made it stand out from the mountain in the background. Looking back now I am pleased with how it came out although the mountain in the background would look better centred.
Mam Tor - Peak District, Derbyshire - UK
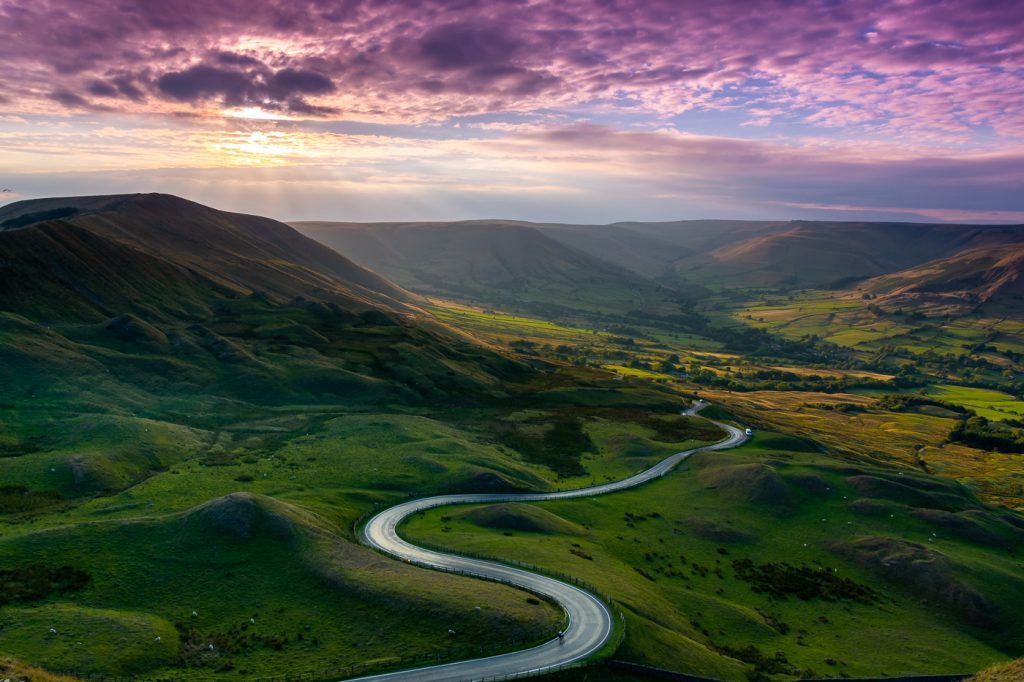
Settings: ISO100 – f8.0 – 1/200 – 17mm
Being born and bred in Derby I was already aware of some of the amazing hikes and views in the Peak District. Having said that I had never been to Mam Tor before. If you haven’t heard of Mam Tor, it is one of the highest peaks in the Peak District and is located near Castleton. I’d seen a few of the photographers I follow on Instagram post photographs from here so thought I’d go and see what it was like for myself. So, Miriam, Dean and I set off into the Peak District and hiked to up the top to take in the views.
For the photograph itself, I decided to take the winding road around Mam Tor the main subject. I did this because I felt that the winding road would naturally lead you through the photograph to the sunset. One problem with this composition, however, was that we were shooting directly into the sun. Shooting into the sun is not the easiest of things to do, so this photograph was a combination of timing, multiple exposures, and the use of filters. I waited for the sun to go behind the clouds and used a grey graduated filter from Gobe. This lowered the exposure and unintentionally provided a purple cast over the sky. To capture the sun rays that were now coming through the clouds, I took a series of bracketed shots that I could combine later in Lightroom to create an HDR image.
Northern Lights over Ersfjord - Tromso - Norway
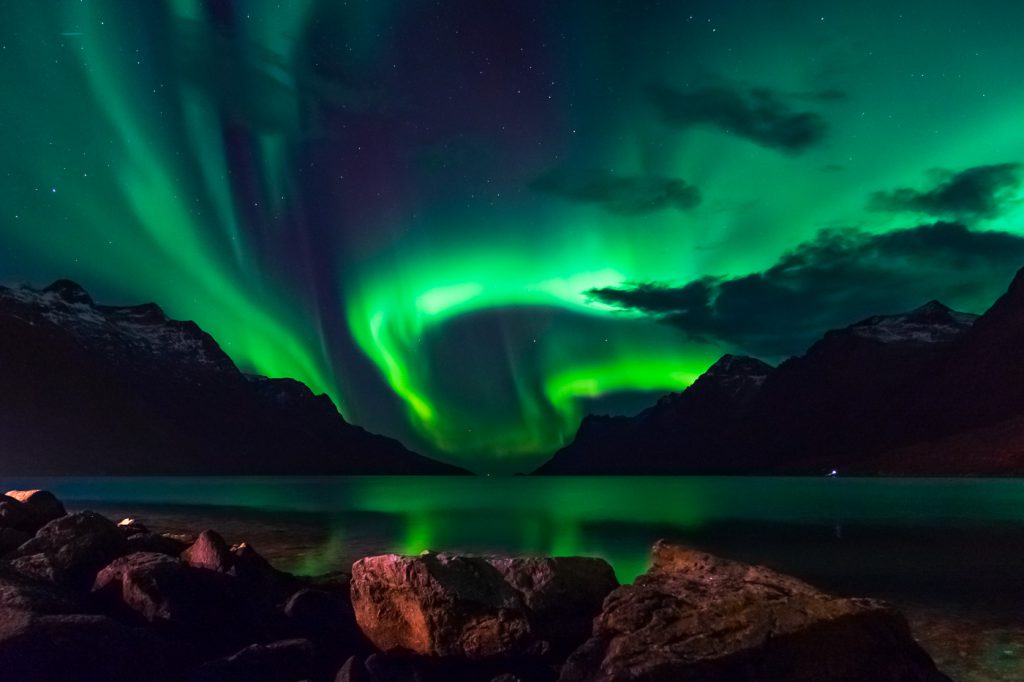
Settings: ISO1600 – f3.5 – 5 Seconds – 17mm
If you ask anyone that is into travelling for things on their bucket list, the Northern Lights are likely to be there. There are several places you can see the Northern Lights from in Europe, so we decided to take a trip to Tromso at the beginning of November. Tromso is the largest city in the north of Norway and is a very popular place to see the Northern Lights. Solar activity during November is also quite high with the best time to see the lights generally between late September – late February.
This photo was taken at Ersfjord which is around a 30-minute drive from Tromso. We decided to head to this place purely because of the water and the mountains, but also because of how dark the area is. Although there were a few houses behind us, there was almost no light pollution. My main memory from that night is the scrambling to find a good spot to photograph from. The Northern Lights started very suddenly and didn’t give us any time to really experiment with compositions. In the end, I settled for a position behind these rocks which were illuminated by a house behind me. This gave me something in the foreground while giving me a lot of room in the sky to capture the Northern Lights.
Looking at the photo now, there are things that could be improved on. For starters, I didn’t follow my own advice from my previous post on photographing the Milky Way. This photograph was done in one shot. If you’ve read my tutorial on photographing the Milky Way, you’d see I recommended creating a composite photograph in this situation. This allows you to get a clear, low noise and in focus foreground, as well as a correctly exposed sky. The same principles would have worked here photographing the Northern Lights. This could have made a huge difference to the foreground and mountains in the photo, especially with reducing noise. It would have also allowed me to stack the focus giving front to back sharpness across the photo. For a first attempt, I am quite happy with it but there are improvements for next time.
Milky Way - Iping Common, Sussex - UK
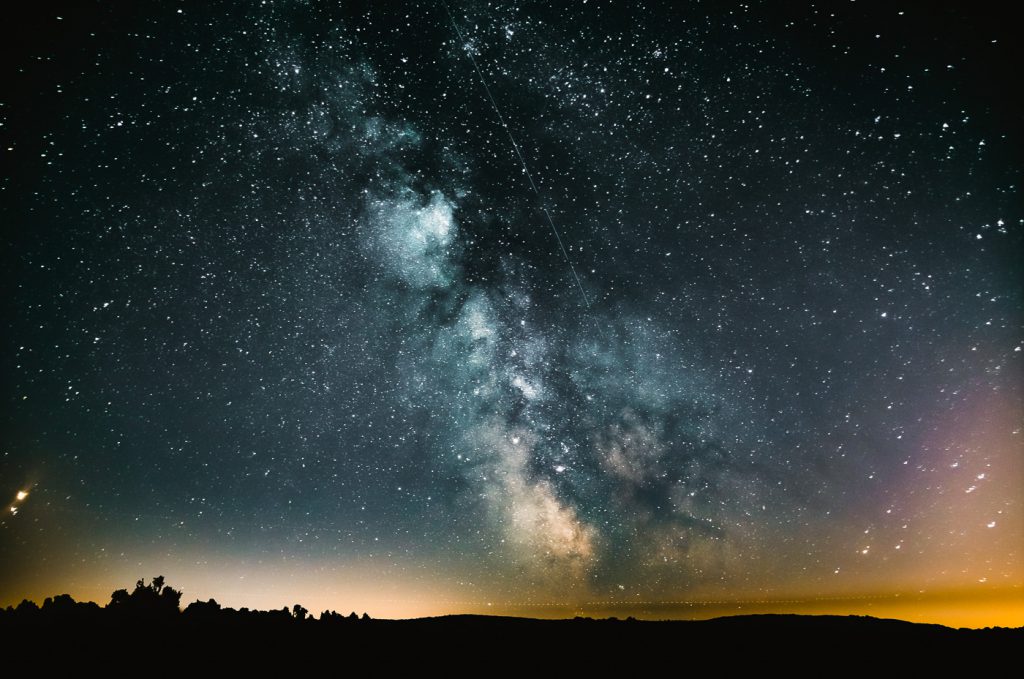
Settings: ISO3200 – f2.8 – 20 Seconds – 17mm – Multiple Exposures (Guide is here)
After my failed attempt at photographing the Milky Way in Kielder earlier in the year, I was determined to have another go. Not wanting to drive 8 hours back to Kielder later in the year I began to search for places to photograph the Milky Way closer to home. I was surprised to find out that there are Milky Way grade dark sites only an hour or so outside of London. So, on learning this I headed down to Iping Common to try again. Since I’ve already written on how I photographed the Milky Way in other blog posts I won’t repeat myself here. What I will say is that seeing the Milky Way for the first time and capturing it with my camera was an amazing feeling. I can’t wait to have another go in 2019.
Manhattan - New York - USA
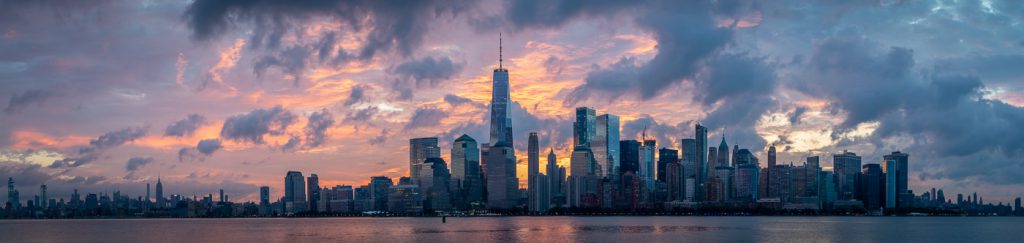
Settings: ISO100 – f10 – 1/5 Seconds – 38mm (5 Shot Panorama)
If I had to pick my favourite photograph of the year, it would have to be this one. I’d been waiting for our entire trip for a clear morning to photograph the sunrise over Manhattan. Thankfully, on our final day, I was lucky enough to get one. I had been to Liberty State Park a few days before so had an idea of what compositions I would go for if I got the chance. I’d initially planned photographs of One World Trade Center and the surrounding buildings but decided to experiment with taking a panorama. And boy am I glad I did. I don’t think I have seen a more spectacular sunrise in person than this one. And with this photo, I was able to capture most Manhattan from the Empire State and Chrysler Building, all the way to One World Trade Center in the middle of the image. I kept the water below 1/3 of the image at the bottom because the sky was simply breath-taking, so I focused on getting as much of this in the image as possible.
O2 Arena - London - UK
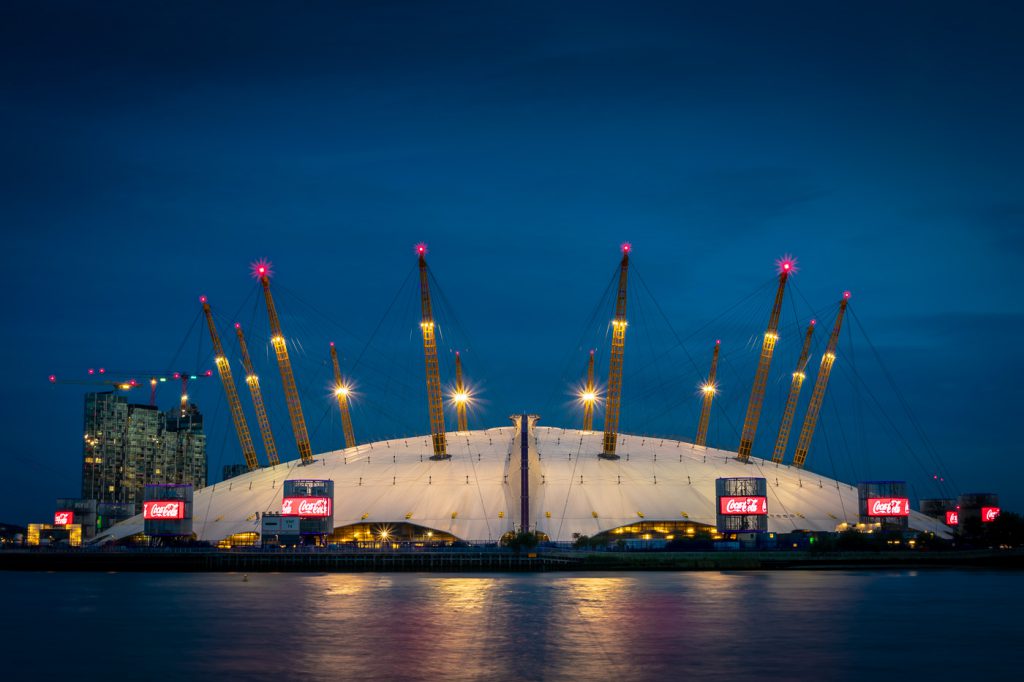
Settings: ISO100 – f11 – 1/6 Seconds – 34mm (3 Shot HDR)
The funny thing about this photograph is that this was not taken at the location or with the composition I had planned when I set out. Before taking this, I had spent several hours further around the Thames hoping for a good sunset to happen over the O2. When that didn’t materialise, I was quite disappointed. On my way back to the East India DLR station I stumbled across this composition completely by chance. I liked the way the walkway was completely central and leads the eye through the middle of the photo.
With the O2 itself being white and well lit up, shooting a long exposure at blue hour would cause it to be overexposed. To get around this, I took a series of bracketed photographs which I combined to make an HDR image.
New York Skyline - New York - USA
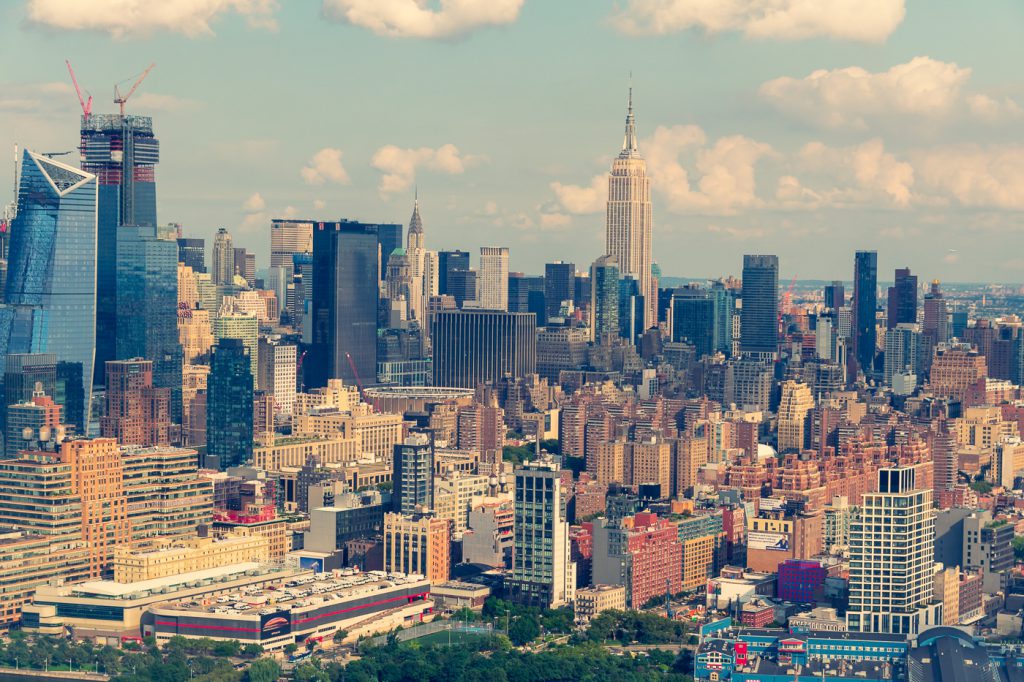
Settings: ISO250 – f5.6 – 1/1000 Seconds – 50mm
The last photograph I have chosen for this post is one I took from the FLYNYON Helicopter while I was in New York. If you’ve read my post on what I learnt from that experience, you’ll know I had my camera set-up in more of a “spray and pray” mode. Because we were moving across the city quickly and I wasn’t sure what I was going to see, I shot as many photographs as I could, hoping to create some good compositions. At the time, I didn’t realise I had taken this as it was one of almost 800 photographs taken in 30 minutes.
What I like about the composition of this photograph is the spacing out of the skyscrapers. On the left, we have Times Square while towards the middle we have the Chrysler Building and Empire State Building. The edit I went for one this photograph was designed to make it look like a 1960’s postcard. This was achieved by increasing the colour temperature and editing individual colours via the HSL panel.
I hope you have enjoyed reading this. If you have questions about any of the photographs in this post or if you want to learn more about what I am doing, please leave a comment below. As always, if you’ve found this article useful, please share and if you want to hear more from me, subscribe below.
Support the Blog
The blog is something I write in my spare time as a way of sharing my photography and what I am learning with the world. Unfortunately, running this blog isn’t free but something I pay for. So, if you have enjoyed this content and have found it useful there are a number of ways that you can help support the blog. With your support I can keep producing content like this.
Amazon Affiliates – I am part of the Amazon Affiliates program which means if you follow my affiliate links and make purchases on Amazon, I made a small commission at no cost to you. If you need to purchase anything from Amazon, please use my links to Amazon UK and Amazon USA.
Buy a Print – I’ve made a small selection of my images available as prints which can be purchased here. Each print is produced on Fine Art photo paper and comes signed and numbered.
Make a Donation – If none of the above appeal to you, then you can make a small donation via PayPal here.

