13 Tips to Help You Photograph the Stars
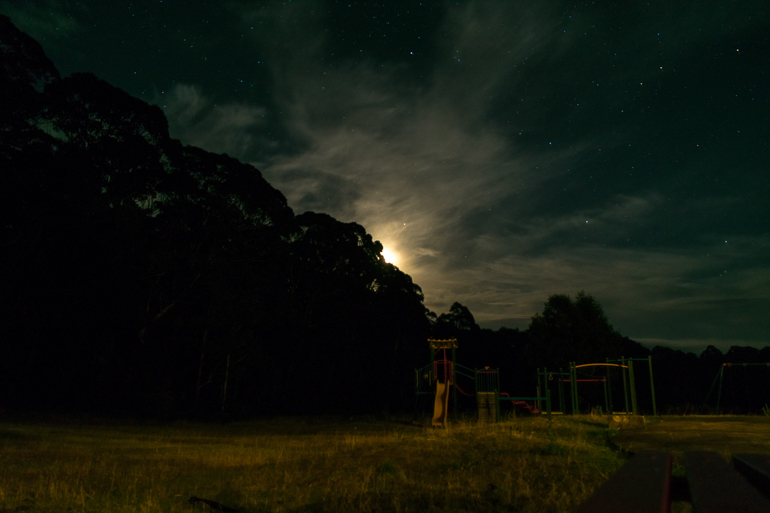
Ever since I got my first camera back in 2018 I wanted to try and photograph the stars. I got my first opportunity in February 2018 while in Australia and was super excited. I propped my camera up on a table with my wallet and pointed it at the sky. Then, without knowing what I was doing, began taking photographs of the stars. As you can see below, it didn’t go too well! At the time I was happy with the photo but as I learnt more about photography, I realised it could have been much better with a little research.
Since then, I’ve continued to research techniques and put these into practice. And on each attempt to photograph the stars I’ve learnt a little bit more on what works and what doesn’t. So, to give you a head start, I’ve put together 13 tips based on what I’ve learnt photographing the stars. As with any of my posts, if you have any questions, you can contact me, or leave a comment at the bottom and I’ll get back to you. I hope you find this useful.
1. Location (find a dark sky)
This is 100% the most important tip on this list. If you are not in a dark sky location then no matter what you do, you are not going to have good results. I live in London and light pollution is a big problem. On a good night, I’ll be lucky to see a few of the brightest stars in the sky from here. The reason you want to avoid light pollution is that it overpowers the night sky. This poses a problem because your camera will capture the light from the city rather than the sky. This makes it next to impossible to photograph the stars under these conditions. I usually have to drive several hours out of the city to find an area that is dark enough to photograph the stars.
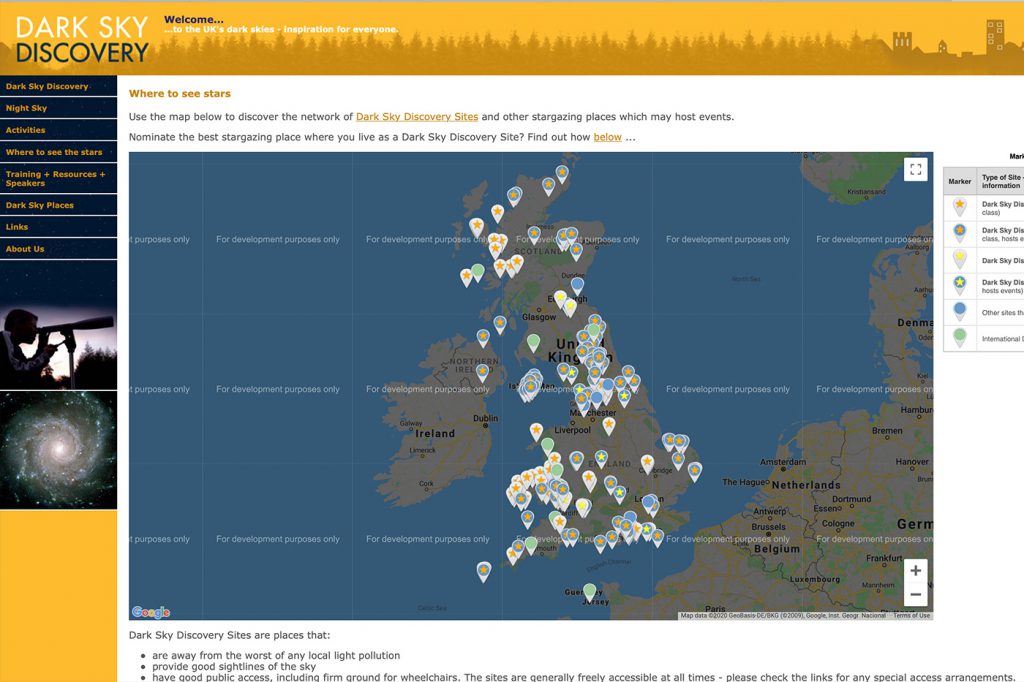
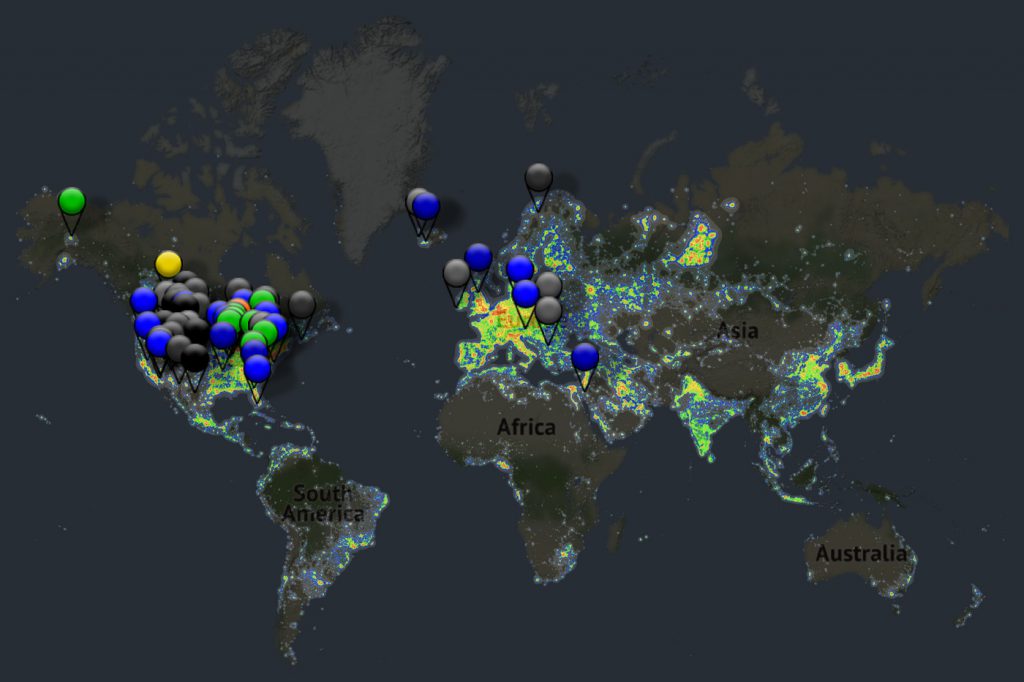
There are several tools that can help you locate a dark sky. One that I use for the UK is DarkSkyDiscovery. This website will show you a huge list of dark skies and their rating across the UK. Some of my favourite places to visit have been Iping Common and Kielder. If you are looking for places outside the UK, DarkSkyFinder is another useful tool. Using its light pollution map, you can find dark sky areas anywhere in the world. Once you have found a location that is close to you, you can travel here for your star photography.
2. Understand the Moon Cycle
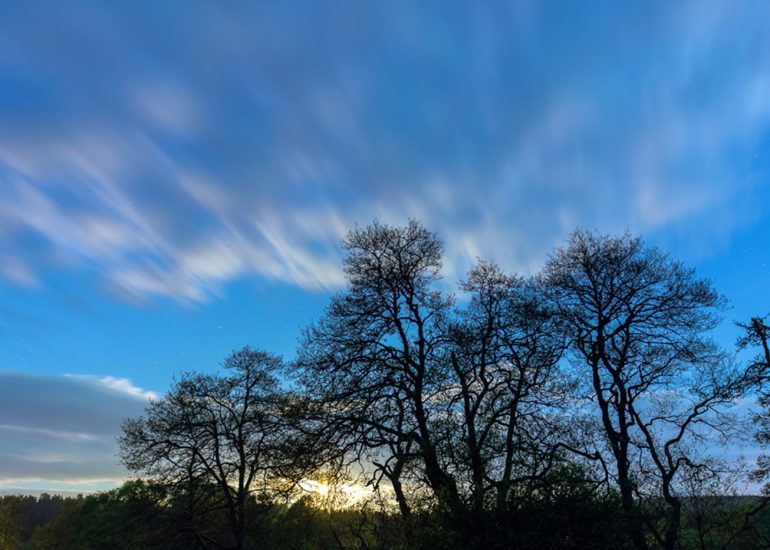
For the same reason we want to avoid light pollution, we also want to avoid moonlight. It has the same effect as light pollution on our ability to see and photograph the stars, even in the darkest skies. I experienced this on a trip to Kielder and didn’t appreciate the effect the moonlight would have. As you can see from the photo below it looks like it was taken during the day despite it being 1am. Some moonlight isn’t always a bad thing as it can help light your foreground. My advice would be to avoid anything more than a waxing or waning crescent (1/4 moon at each end of the cycle). More than this will reduce your ability to photograph the stars and Milky Way.
3. Check the Weather
Now you have a location and have chosen a date that fits with the moon cycle, the next thing to do is to check the weather. It should go without saying that you need to have clear skies to photograph the stars. A few clouds aren’t the end of the world and they can add to your photograph, but you should try to avoid where you can. As well as covering up the stars, another problem they cause is that they reflect light. This can cause the sky to not get as dark as it should making the stars more difficult to photograph. One app that I find useful to help with this is Sky Live. It shows an overall star gazing percentage for your chosen location, as well as information on the weather. It also provides a forecast for 7 days so you can plan your trip in advance.
One last point on the weather is to use several sources of information. These could be general weather reports and cloud cover forecasts from different sources. I’ve been caught out on a few occasions where I’ve relied on a single source, only to turn up and have poor weather. By combining sources, you can give yourself the most informed view of the conditions.
4. Plan Your Photograph in Advance
Before you get to a location, it is good to have an idea of the kind of photograph you want to take. To help you think about this you can break this down into a few areas. The first area is the type of star photograph you want to take. Do you want a star trail photograph? Do you want to photograph the Milky Way, or do you want to photograph a specific constellation? Secondly, think about the other elements you want in your photograph. These could be things in the foreground like trees, or something like a hut or a car to give scale to your image.
By thinking about your image in advance, you’ll be able to think about how to achieve it more methodically. You’ll have a clearer idea of things such as the settings you should use. What the best location will be and at what time. Whether you need multiple exposures, and if so, what they are going to be used for in the final image. This is a much better approach than turning up at the location and winging it.
5. Arrive at Your Location Before it's Dark
Once you have decided on your location one useful tip is to arrive an hour or two before it gets dark. This gives you plenty of time to explore the area and get a composition you are happy with. The last thing you want to be doing is wandering around in the dark, especially if this is a brand new location.
If you have followed the previous tip, you will already have some ideas for your photograph. But you may be thinking “it is still light, how will I know where the stars/Milky Way will be?”. Well, there are a few tools you can use to help with that. One of my favourites is an app called SkyView. Apps like this let you pick a date and time and see exactly where things will be in the sky at your location. You can then use the AR feature to fine-tune your composition around the position of constellations and the Milky Way. By arriving early, you are giving yourself the best opportunity to get the photograph you want.
6. Use a Camera with Manual Mode
Sorry folks, automatic mode is not going to cut it here, you need to use a camera with manual mode. This means a camera that allows you to set the ISO, aperture and shutter speed yourself. You will find the “M” mode on most modern DSLR and Mirrorless cameras. It is not as scary as it sounds, trust me. Once you understand the key concepts, you’ll realise the hardest part is not taking the photograph, but getting the right conditions. Taking the actual photograph is the easy bit! To photograph the stars, you’ll need to use a combination of rules and concepts. One of the most important rules for photographing the stars, and our next tip, is the “Rule of 500”.
7. Understand the Rule of 500
The rule of 500 is one of the most important rules when it comes to photographing the stars. What this rule tells you, based on your camera and lens, is the maximum shutter speed you can use. What do I mean by maximum? As we all know, the Earth rotates around its axis once a day. As the Earth rotates the stars appear to move across the sky. What the maximum shutter speed refers to is the amount of time you can keep the shutter open before the stars begin to blur. Now, why is this important I hear you ask? It is important because we want the stars to be pin-sharp and not streaky lines.
Here’s a closer look at the rule of 500:
Shutter Speed = (500 / Focal Length)* Crop Factor
Let’s break it down. The focal length refers to the mm setting on your chosen lens. If I am using my Fujinon 16-55mm F2.8 set at 16mm, 16 would be the number I would use in this formula.
The crop factor is specific to the size of the sensor in the camera you are using. Full frame cameras have a crop factor of 1 due to the sensor being the same size as a 35mm piece of film. APS-C or crop sensor cameras have a crop factor of between 1.5 and 1.6 depending on the brand. In Micro 4/3s cameras, the crop factor is usually 2. I use a Fuji X-T3 which has an APS-C sensor so the crop factor for my camera would be 1.5. If you are unsure of what type of sensor your camera has, Google is your best friend here.
I’ve created a table below to show some examples of the formula in action:

As you can see from the table, the combination of camera and lens can have a dramatic effect on the shutter speed. Full Frame cameras allow you to have a longer shutter speed when compared to crop sensor cameras. But paired with the right lens, a crop sensor camera can achieve a comparable shutter speed. In the 12mm example above, the APS-C camera achieves the same shutter speed as the full-frame camera.
Experiment with the formula above and work out the maximum shutter speed you can use.
8. Use a Fast Wide Angle Lens
As we established in the tip above, using a wide focal length means we get a much longer shutter speed. This next tip is about maximising the amount of light your camera can capture during that time. By maximising the amount of light captured the more detail we can capture of the stars and the Milky Way. To do this you need to use a lens which gives both long shutter speeds and has a fast aperture. This combination will allow you to capture as much light as possible. A typical kit lens such as an 18-55mm has a max aperture of f3.5 at 18mm. This is a good starting point if this is the only lens you own.
If you want to maximise the amount of detail you can capture you should look for a wider focal length lens with a faster aperture (f2.8 or less). I recently purchased the Samyang 12mm f2 lens for my Fuji X-T3. Compared to my Fujinon 16-55 f2.8, this lens gives me 7 seconds of extra shutter time, and at f2 captures 50% more light. This allows me to capture more detail than I otherwise would have been able to.
9. Turn Up Your ISO
One common misconception is the higher your ISO, the more noise you will get in your photograph. This can be true but for photographing the stars we must treat it differently. Without getting too technical this due to the signal-to-noise ratio in our photographs. The signal is the light our camera captures, while noise is created by the sensor in our camera. Our sensor can create noise in a few ways. When using long shutter speeds, our sensor will heat up which creates electrically induced noise. Another way noise is created is by high ISOs. When we use a high ISO we amplify the signal which creates artefacts aka noise in our images.
To achieve a low noise photograph the signal needs to overpower the noise created by the camera while achieving correct exposure. But when we photograph the stars we are capturing a weak signal. The light from stars has travelled trillions of millions of miles to Earth and there is no way we can increase the amount of light from them. We are also using long shutter speeds which introduces electrical noise. So how do we go about this? If we were to use the base ISO (100 for most cameras), the only noise produced will be electrical noise due to the long shutter speed. But we end up with an underexposed image because our signal is weak. To get to the correct exposure, we would need to boost it in post-processing. But what this does is further exacerbate the electrical noise as well as adding artificial amplification. What we end up with is a very noisy image which is what we don’t want.
If we use a higher ISO (3200 for example), the camera amplifies the signal resulting in a much brighter and correctly exposed image. Although we’ve added “noise” by increasing the ISO, we’ve also increased the signal, although artificially. The end result is a better signal-to-noise ratio than achieved using a low ISO and boosting in post-processing. And a better signal-to-noise ratio equals a photograph with lower noise. It might take a bit of time to get your head around because it seems counter-intuitive, but try it for yourself.
To determine the ISO you should be using, take a series of test shots on the night. Using your maximum shutter speed and widest aperture, set the ISO to 800 and take a test shot. From here, increase the ISO to 1600, 3200, and 6400 and take test shots for each. Compare these against each other to see which has the best balance of detail vs noise. This will help you determine the sweet spot for your camera. When I photograph the stars, I use an ISO of either 1600 or 3200. Don’t be too worried about the noise in your photographs at this stage. There are several methods for reducing noise and adding detail that can be done in post-processing.
10. Use a Tripod
As we are using shutter speeds higher than 1 second we need to use a tripod. And as they are likely to be higher than 10 seconds it also needs to be a sturdy one. Any slight movement while the shutter is open is going to cause a blurry image which we do not want. If you do not own a tripod, then I would suggest that this is an accessory that you invest in. A general rule of thumb is always to buy the best one you can afford. As I wrote in my camera accessories post, I made the mistake of buying a cheap tripod early on and this was quickly replaced with a more expensive one. If I had invested properly early, I would have saved money overall.
11. Shoot in RAW
In my mind astrophotography is 30% location, 20% photography, and 50% post-processing. Because of this, you want to ensure you are working with the largest amount of data possible in post-processing. Shooting your photographs in RAW will ensure that you have this. A RAW file contains all the unaltered data your camera sensor captures and is a lossless format. A JPEG in comparison is a compressed format which has had data removed to create a small file size. You will need to edit your RAW file in software such as Lightroom or Photoshop to get the most out of it. Using editors like these on a RAW file will allow you to produce photographs that you just can’t with JPEGs.
12. Use Live View and Manual Focus
One of the challenges with trying to photograph the stars is getting them sharp. As stars are tiny with the closest being 25 trillion miles away, autofocus is going to be of little use. To get our stars in focus we need to do it manually. There are a few methods we can use:
Focus to Infinity
If your lens has an infinity focus mark on it ∞ you can rotate your focus ring to this to achieve infinity focus. In a lot of cases, this will get you 95% of the way to sharp stars for your photographs. But, on several lenses I’ve used, the infinity marker hasn’t always been 100% accurate for the stars. If you want to guarantee pin-sharp stars try the next method below.
Use Live View
Another method is to use the screen on the back of your camera. Point your camera towards the brightest stars in the sky zoom in as far as you can. From here you can adjust your focus until the star is pin-sharp. This is the method I use as it has gotten me the best results on my lenses.
13. Stack Images instead of using in Camera Noise Reduction
One of the issues of using a high ISO and long shutter speeds to photograph the stars is noise. To combat noise caused by long exposures, most cameras have a setting called “long exposure noise reduction”. While this can reduce noise in your photographs, it sacrifices detail in doing so. Another issue is that it doubles the length of your exposure meaning you wait longer to see your results. I don’t believe this is the best solution for reducing noise and would suggest turning it off. There is a much better way of reducing noise in post-processing and this comes in the form of image stacking. This not only reduces the noise in your photograph but increases detail at the same time.
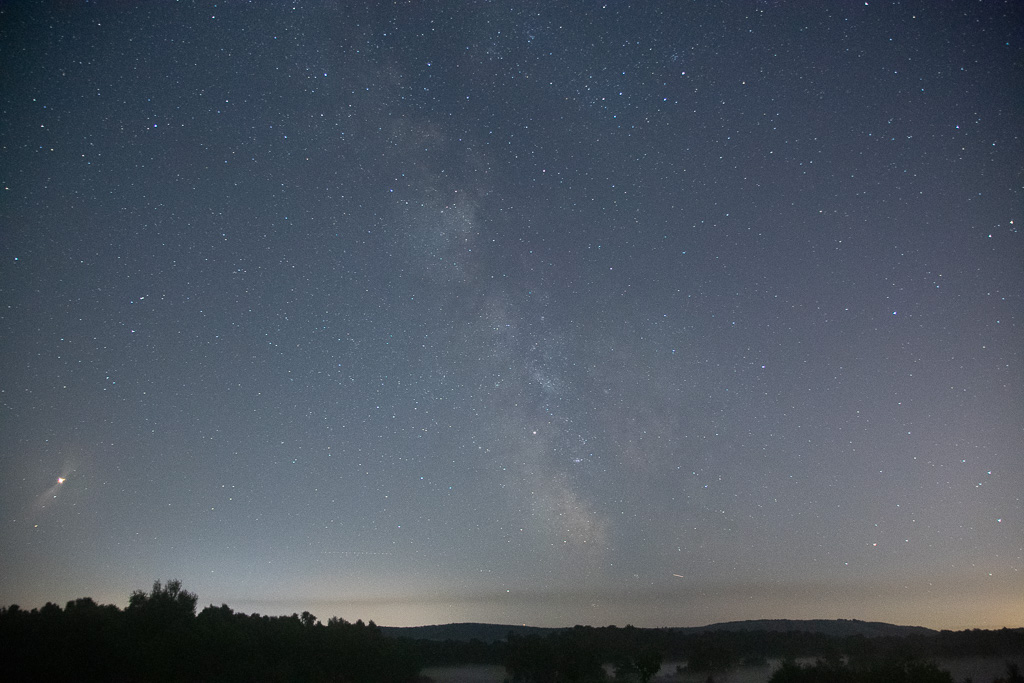
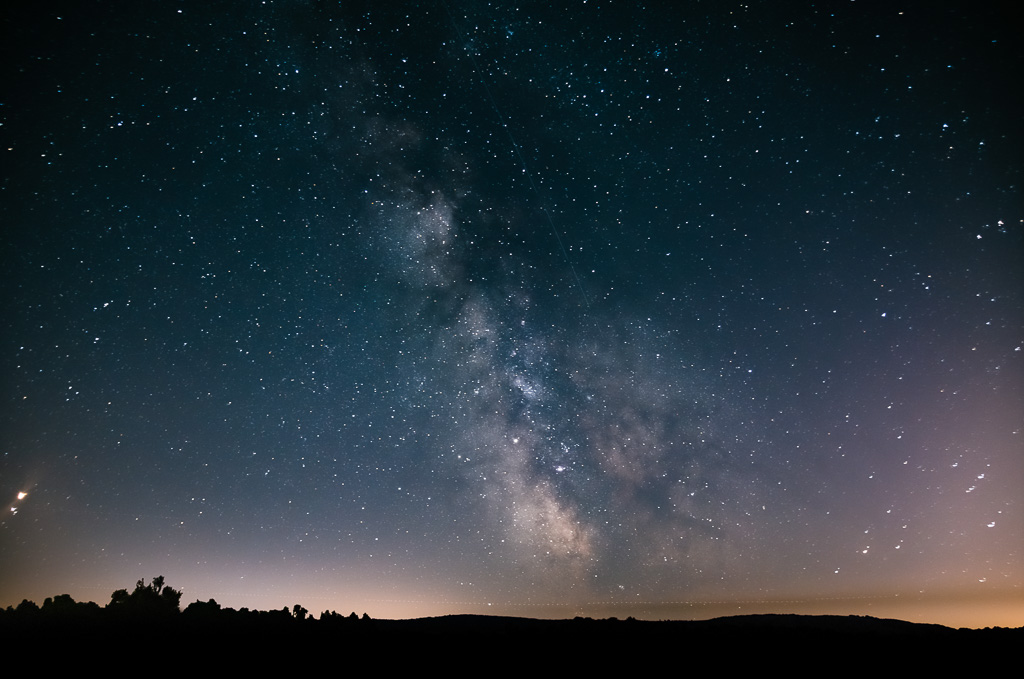
Several programs can help you do this depending on what platform you are using. If you are using a Mac, there is Starry Landscape Stacker which costs £38.99 from the App store. If you are on Windows there is a free piece of software called Deep Sky Stacker. I used this program on the image you can see above. To do stacking you need to take three types of photographs. These are: Light Frames, Dark Frames, and Bias Frames. These can then stacked in one of the programs above to create an image which has more detail and less noise. This can then be moved into a photo editor such as Lightroom or Photoshop to create the final image. If you want to know what these type of photographs are, you can read my post on how I photographed the Milky Way. In this post, I go into detail on the process I used as well as how I planned my trip.
So, there you have it, 13 tips to help you take better photographs of the stars. I really hope you have found it useful. As always, if you have any questions or comments, please get in touch or leave them below.
Support the Blog
The blog is something I write in my spare time as a way of sharing my photography and what I am learning with the world. Unfortunately, running this blog isn’t free but something I pay for. So, if you have enjoyed this content and have found it useful there are a number of ways that you can help support the blog. With your support I can keep producing content like this.
Amazon Affiliates – I am part of the Amazon Affiliates program which means if you follow my affiliate links and make purchases on Amazon, I made a small commission at no cost to you. If you need to purchase anything from Amazon, please use my links to Amazon UK and Amazon USA.
Buy a Print – I’ve made a small selection of my images available as prints which can be purchased here. Each print is produced on Fine Art photo paper and comes signed and numbered.
Make a Donation – If none of the above appeal to you, then you can make a small donation via PayPal here.

